Curious about Trae AI? This guide explores what makes Trae AI a game-changer in web design and walks you through how to create a stunning website in minutes—without any technical skills.
Till now you must have seen many AI tools with the help of which you can create complex web applications or business websites or mobile apps. I have written several AI tools reviews and so many other bloggers too have written reviews on AI. But the tools that have been shown to you till now have some charges. If we talk about Cursor AI, it is a very good AI platform. But if you look at the pricing, there is a free plan but it is limited. If you want to use this tool continuously, then you have to pay subscription fee which come around $20 or $40 per month.
And I know that today the new beginners who are learning AI do not have enough amount to take paid subscriptions. So in this post, we are going to use such an AI tool which is 100% free of cost till now. It gets installed easily on Windows and Mac and there are many latest AI models which you can use easily and you do not need to pay anything. So here I am talking about Trae AI you can also called it Trae IDE.
A Complete review on Trae AI or Trae IDE. Full Tutorial to Build a Website with Trae AI?
In this guide you are going to discover a complete Trae AI review or Trae IDE . We will cover what Trae AI or Trae IDE is and provide you practical guide to build website using Trae IDE.
What is Trae AI or Trae IDE?
Trae AI or Trae IDE is a AI-powered coding partner through which you can build a website without having coding skill. The Trae IDE has unique features like AI AI Q&A, code auto-completion, and agent-based AI programming capabilities. While you work on your projects with Trae IDE, you can easily collaborate with Trae AI and enhance your development efficiency.
This is a free of cost AI platform which you can install on your computer and with the help of this tool you can create website. I have installed Trae IDE on my computer and have tested to create the website. It is working on a local server. It has created all the pages like Home, About Us, Services, Portfolio, Contact. It has made the home page section quite elegant. It has also created footer etc. Counter values have been placed here. If we go to the contact page, then a contact form has also been created. Contact information has also been kept.
Social media icons have also been placed. If I click on any one of my social media icons, then my social profile also opens. So this is the kind of website we are going to create in today’s guide. You just have to write the prompt. Just give one command that can create your business website.
What Can You do with Trae AI?
Trae AI provides several essential IDE functionalities, which includes: code writing, project management, extension management, version control, and many more.
You can collaborate your coding projects with Trae IDE seamlessly into your workflow, which helps you to maximize performance and development efficiency.
- Use Trae AI as AI Agents: You can customize your own AI Agents. Trae AI brings you a powerful configurable agent system. By customizing tools, skills and logic you can create your own AI team to work for you.
- Use Trae IDE as Coding Tool: As you use Trae AI you will discover more tools in it. It helps you to integrate with various external tools and also enables you to use agents. right now Trae supports the Model Context Protocol (MCP) through which agents get access to external resources to enhance your task. So, you have got more tools, more capabilities.
- Using Context Functionality: You can keep the accuracy in your work, because it is said that more context, more accuracy. Trae has the capacity to understand your development context deeply through code repositories on the IDE at the same time it can collect external information from online researches and documents.
- Autocomplete: Trae AI has another powerful functionality that is “Autocomplete”. This helps you to boost efficiency with smart completion. Trae has a capability to extend your code in real-time, and automatically apply the changes for you.
- Use Trae as AI Assistant: Trae can be your powerful AI Assistant. It is like AI question and answer, you can chat with AI assistant while you are coding to guide you regarding code or fixing any error occur in the code. Your AI assistant will learn the current code and provide you suggested code in real-time within the editor. You can tell AI assistant what kind of program you want to develop and your AI assistant will provide you code automatically.
Supported Operating Systems
Trae IDE can be downloaded on both operating system: macOS and Windows
- macOS 10.15 or later
- Windows 10, 11
How to Set up Trae IDE on your Computer?
Now we are going to learn how can you ste up Trae Ide on your computer step-by-step.
Step 1: Install Trae AI and Launch
If you have not install the Trae software then install now. To install and launch the AI on to your PC
Go to Trae IDE website and download the software. By clicking on the Download button you can download it. Once downloading complete launch the IDE on your PC.
Now check the Trae Icon on your desktop and click on the Trae icon to get started. You will see the welcome to Trae window open.
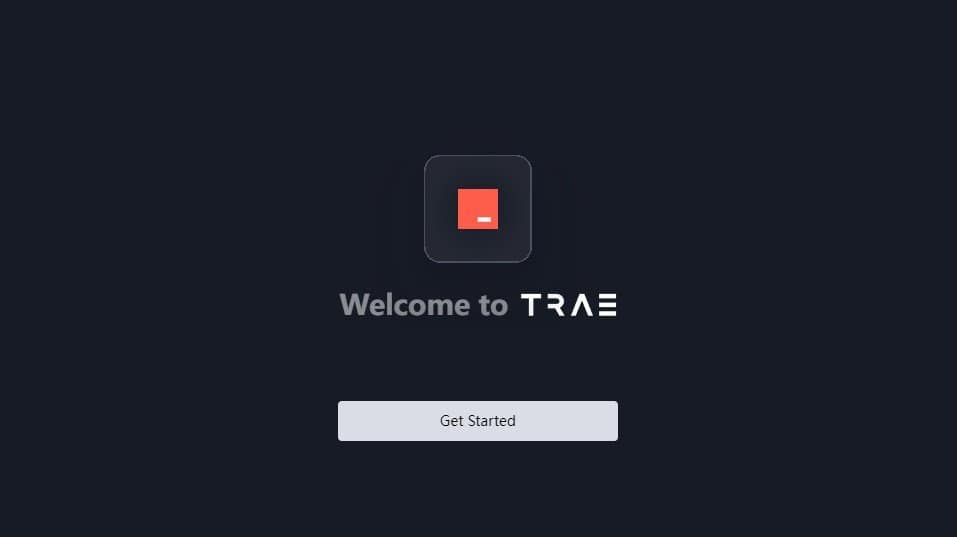
Now click on the ‘Get Started” button as seen in the screenshot above. Your set up will begin now.
Step 2: Now Select the Theme and Language
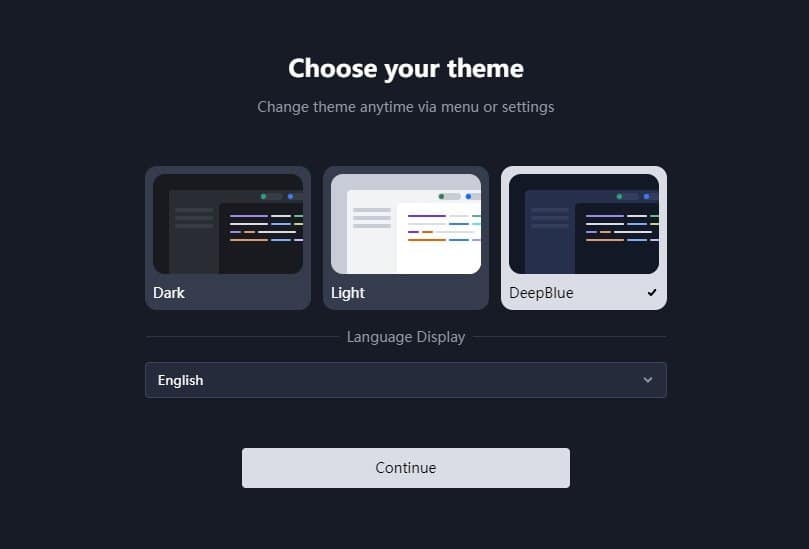
There are three theme option: dark, light or white and deepblue.
Then select the language: there are multiple options, you can select English, Chinese or Japanese.
Then click on continue button
Step 3: Install “Trae” Command
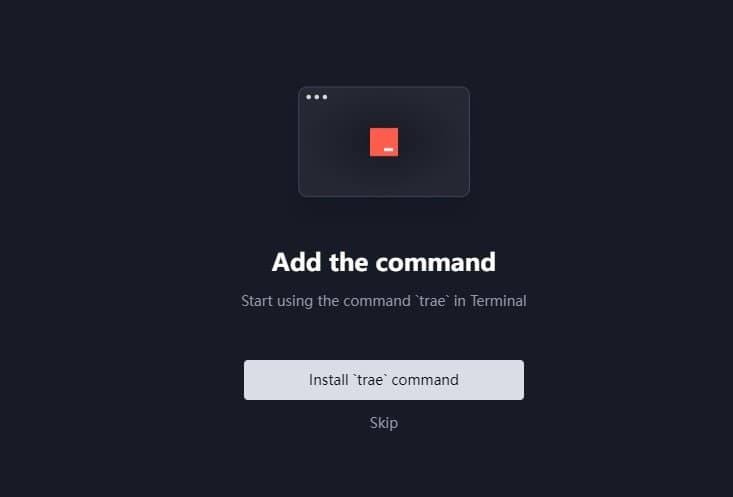
In next step you have to add ‘Trae’ command. If you click on continue button popup window will appear where you will find Install ‘Trae’ command. Now click on the Install ‘Trae’ command button. In few seconds it will be added to it.
Step 4: Log in to Trae AI
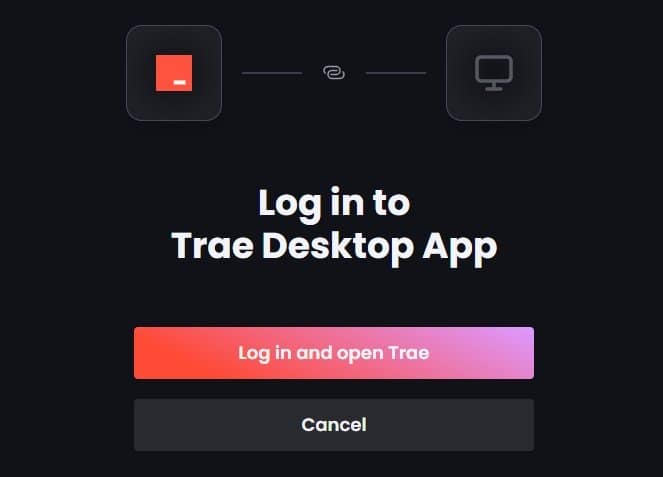
Your set up is done. Now you can log in to Trae IDE. To do that
Click on Log in button, then it will take you to Sign Up or Log In window.

If you have not created account you need to create account providing your email and password. You will receive verification code in your inbox, enter the verification code and sign up.
Once your sign up is completed then log in into Trae with your user name and password. Then you will be directed to Trae IDE homepage after log in.
Step 5: Start Developing Coding with Trae
Now it is time to start your developing work. You can start developing through either opening existing folder or cloning Git repository or create from zero using AI assistant.
And you can also create your own custom AI agent here. You can put your photo. You can give your name and your own agent will be ready which will work on your commands and prompts.
Building a Website With Trae IDE
So let’s dive in to this quickly and see how to create a fully featured website with the help of Trae AI.
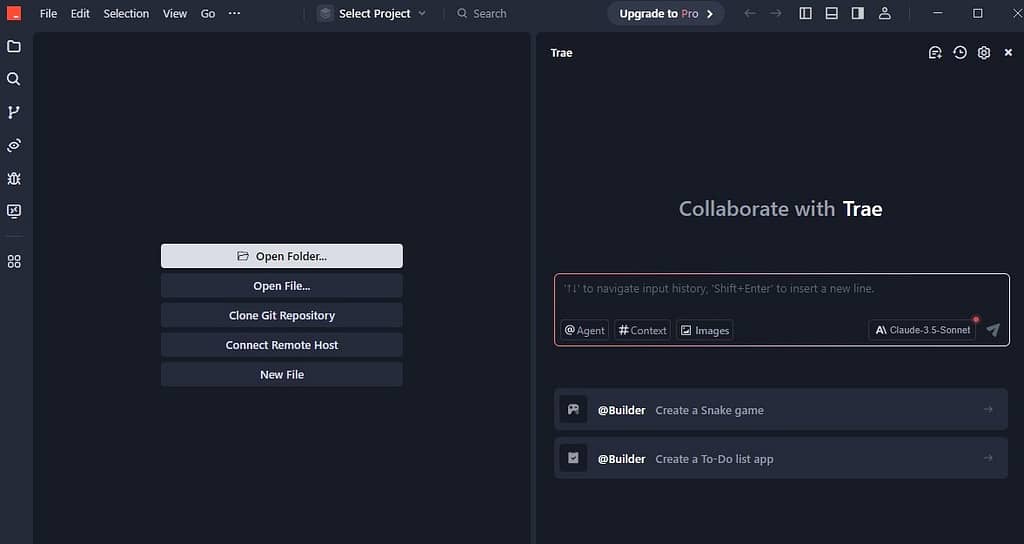
This is the chat box. On the left hand side, many folders etc. get created or the progress of the codes etc. will be visible to you here. And this is very easy. Now, according to our plan, what is the first step? We have to create our own AI agent. And you can create it absolutely free of cost.
Step 1: Create AI Agents
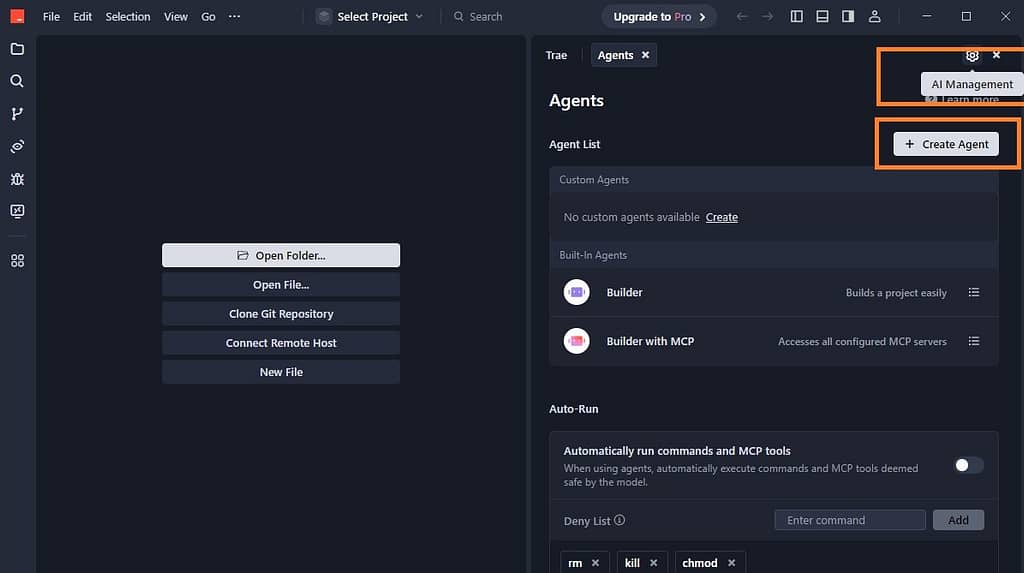
How? Look at the top right corner, there is a settings icon. What is written there? AI Management. Click on it and Agents is given here. Let’s click on it. As soon as you click on it, you will see a list of agents. I had already created an agent named Digital AI Agents. And some built-in agents are already available here. Like Builder or Builder with MCP.
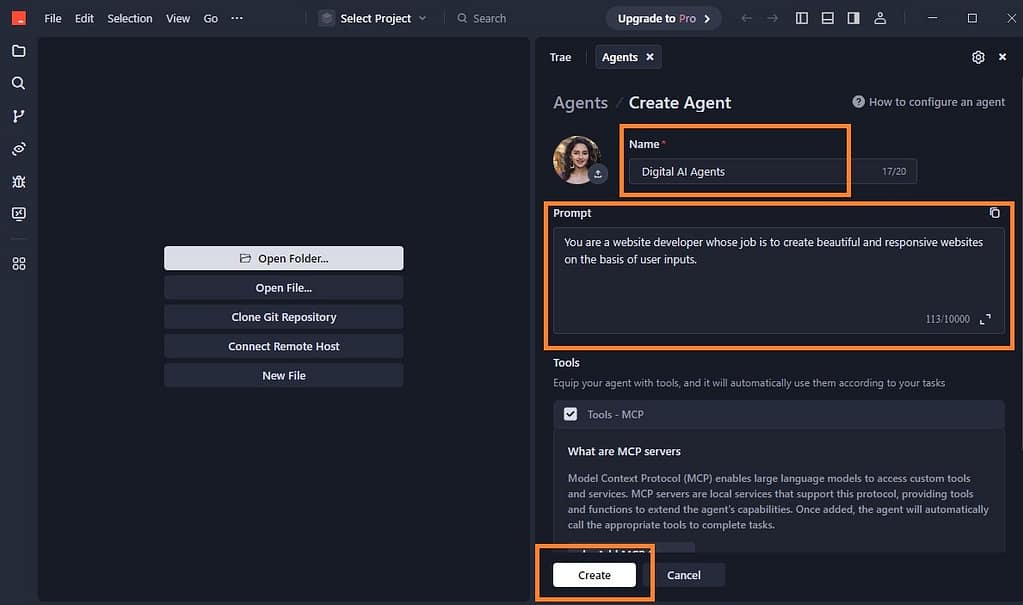
To create a new AI agent, you simply have to click on Create Agent. Give a name to your agent here. For example, I will name it Digital AI Agent here. You can name it anything. If you want to put a photo or something, then put it here. And inside the prompt box, we describe our AI agent. What is going to be its role? What will be the tone? How will the work flow work? Although this is optional, but we can write something here.
May be you can write something like this in the prompt box: “You are a website developer whose job is to create beautiful and responsive websites on the basis of user inputs.” I have only described it this much. This is not mandatory, it is optional. If you want, you can describe it. Otherwise there is no such problem. Some MCP servers are also given here which you can use.
What is MCP Server?
MCP simply means Model Context Protocol with the help of which you can access custom tools services. For now let’s leave it unchecked and simply click on Create. And then you have to click on Use Now. Your AI agent has been created.
What is AI Agent?
AI Agents is your AI assistant to help you or guide you in developing your project efficiently. Either you can create your own AI agent or use built-in AI agents.
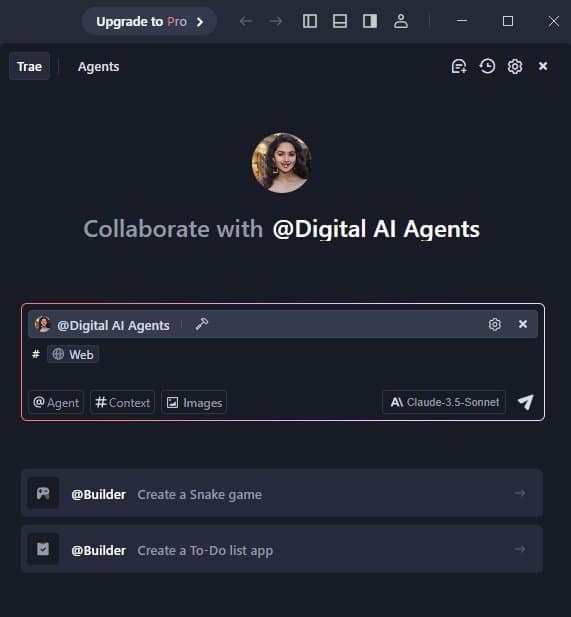
I have created AI agent ‘Digital AI Agent’ is its name. And look here AI agent is also selected. In case you do not see AI agent here. Suppose I have turned it off. Now AI agent is invisible. So simply click on this agent option. And here it is always AI agent in custom agent. Now there are many AI models available here which you can use absolutely free of cost. Like there is Cloud 3.5 Sonnet. There is Cloud 3.7 Sonnet. Cloud 4 Sonnet has also come just now. This is the latest. There is j 2.5 Pro. There is j 2.5 Flash. GPT 4.14 DeepSeek etc. all AI models are available here.
Also read: What is AI Agents? How to Build AI Agents with N8N Platform?
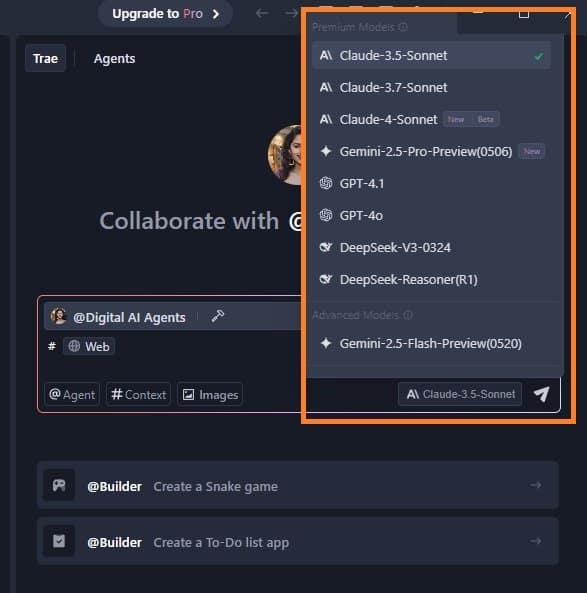
Practical Steps to Use AI Agents in Trae IDE for Building a Website
- Select AI Model
We will use Claude-4 Sonnet on it which is the latest one. So I have selected it. Now I have to get a website developed. So I already have a prompt. I have provided prompt to AI agent. I want to create a professional website for a digital marketplace named Pixaland. I want to create this website similar to Freepik.
- Provide Prompt (Explain the type of website you want to build)
Now enter prompt on the prompt box. After this we will simply click on the arrow. Now it will ask you to open a folder. We have to choose a folder or create a folder. All the files that it will create, all those files get saved inside that particular folder. And that folder gets created on our computer. So you will click on open folder. When you choose that folder it will be open and used by Trae. All your codes file will be saved automatically in this folder. Once the Trae completed the coding you can go to the folder to see how codes file are arranged within the folder.
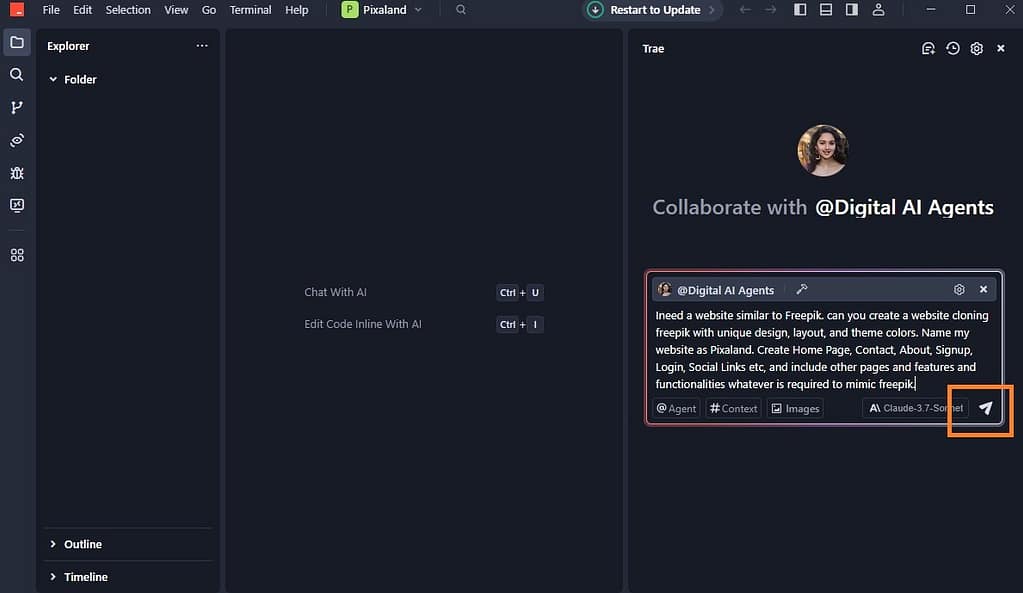
Remember, when you provide prompt you need to explain what type of website you want to build, what are the pages and functionalities you need in your website. Explain clearly in the prompt. Once you enter the prompt, wait Trae AI to finish the task. Sit comfortably while your entire website is being made and ready.
How does AI Agent will process the work? First of all it analyzes our prompt and AI Agent will inform like this “I will create a professional website.” It will also mention about the pages and functionalities that you explained in the prompt. Now what initial page will it create? Index. This is basically our home page. When any user opens the main domain, this index opens.
- Click on Accept All
As the AI Agent start developing web pages one by one it will ask you to review and ‘reject all’ or ‘accept all’. You need to click on the accept all. Then AI agent continue its work. Now it has written all these codes for our home page or our index file. So we have to accept. Whenever it will ask you whether to accept or reject. So you keep accepting at every step so that whatever folders, whatever files it is creating, see index on the left hand side. It has created all these codes, it has written here. When you accept, this code gets saved in the index. file.
After this, it is creating the next file. Which file is it? Styles.CSS. With the help of this file, our website’s designing etc. works. Meaning, what is going to be the color scheme of our website? Is there any animation effect etc. or how is the website going to look? So as soon as this file is completed, it will ask us again whether we want to reject the changes or accept them, then you will click on Accept All.
- Run the Website
Now our website is ready. Here comes an option to run. What will it run? To see the website, we are going to need a local server here. We have not taken domain hosting yet. So, with the help of the local server on our computer itself, we can see the preview of the website etc. So you simply have to click on Run. So the work is complete. Here the final message also comes. The website is ready for deployment includes all essentials etc.
Final Thoughts
This is how you can build a website with Trae AI. You may face certain issues while working on your project. Sometime you have to wait for a long time AI to respond. It happens due to long queue. But if you go with premium you don’t have to wait in queue. There is also an update, it comes frequently. It will be visible or notify to you on your dashboard whenever there is update available.
So now we have learned how to create a website with the help of Trae AI. It has also created all the required files for us and all these files are also stored in a folder. But right now our website is not running on the internet. It is running only on the local server. To run this website on the internet, you must have a real domain name and a web server which is also call web hosting.
